I recently updated our Powderkeg Linkedin company page to use some of the new customization features they added to allow company pages to be more engaging. Since editing your Linkedin company page is not as common as say a Facebook business page, I thought it would be helpful to list the steps I took and show where and how to edit your company Linkedin page.
Where do I go to edit my company Linkedin company page?
Chances are your company has a company page on Linkedin, whether someone set it up or not. Company pages are added automatically if any employee adds it to their work experience.
To edit your Linkedin company page, navigate to the company page by clicking on it from your profile or doing a search. Once you are on the company page, assuming you are the admin, you will have the ability to edit that page by clicking on the blue edit button in the upper right corner. If your company has not been claimed then you will see an Add Company button that you can click to take ownership of the company. In order to claim your company page, you will need to enter your business name and email. The email can not be Yahoo, Gmail, Hotmail, etc. If you are claiming the Powderkeg page, it would after to be an @powderkeginteractive.com email address.

What can you customize on your company Linkedin page?
When I got into the Powderkeg page to start editing it, I was a bit confused at first but I was able to break it out into 5 main areas or steps you will want to make sure to edit.
1. Overview – This is the first page you will come to when you click on the edit button. Here you are able to update the company name, company description, and page admins. Below that you will see a place to upload an image and two logos for the company. The image is like the Facebook cover photo. The logos are self explanatory. Further down you will be able to add the company specialties, these are important for being found in searches on Linkedin. To the right you will see some more areas you can edit such as company type, company size, company website, operating status, year founded and company address(es).
2. Services – When you first click on services, you might be a little thrown off that it takes you to the actual services page that a user would see. I was expecting to stay in edit mode, but you actually have to click on the blue edit button again. When you click on the blue edit button you will be taken to the edit page for the default services overview page. The first step that Linkedin shows you is creating an audience, this lets you create different services and product pages for different groups of people. I could see this being helpful for a company like a clothing store where they want to display female products for female users and male products for male users. For our case at Powderkeg, just the one default page for everyone was good.
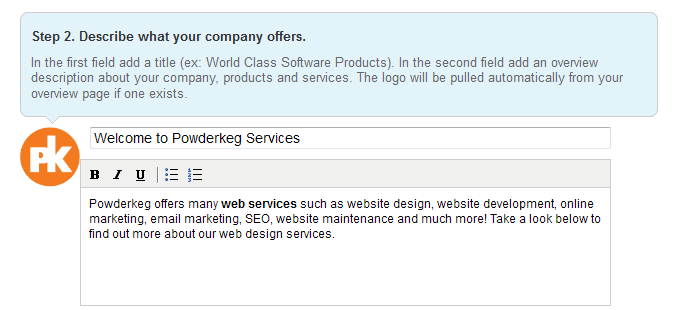
The next step that they show you in where you can enter in a title and description for your services and products page.

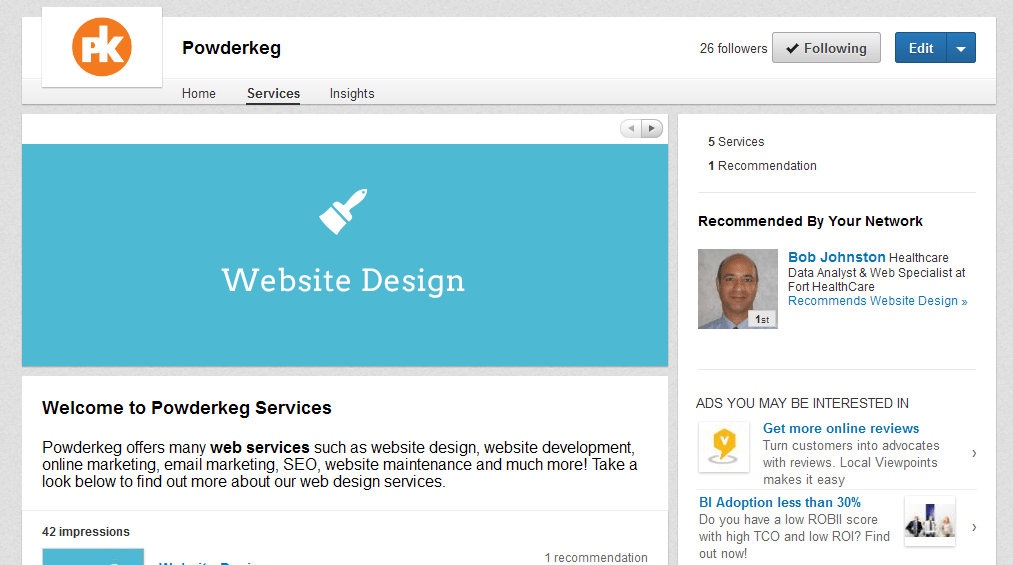
Step 3 allows your to add 3 photos with links where you can call out attention to specific services or products of your choice. It took me a little bit to see where this was used on the page but they actually show up as a slide show on top of the services and products page itself (blue website design slider below).

The last step lets you control the order in which your products and services appear on the page. You most likely have not added any yet, so just remember to come back here to order them if you need to. When you are finished, do not forget to scroll back up to the top and hit the publish button. This will take you back to the front end services page that a normal user would see.
The next step would be to hover over the arrow on the blue edit button (but not click it), you will see a drop down appear, one of the options will be Add product or service. Click on that. This will take you to the page where you add your product or services one item at a time. There is 11 different steps on this page which you can add information. The first step is to simply pick if it is a product or service. Step 2 is to pick the type or product or service that it is. Next you can enter the product or service name. Step 4 lets you add an image of that product or service… and so on. When you are finished adding any information you would like, you can then click on publish and add the next one. In the end, you will end up with something like this:

3. Careers – If you hover over the edit button arrow, you will see a drop down option to add jobs. This will direct you to a page with a bunch of different options for adding jobs to your page. Linkedin is obviously a great source of professionals in which you can access to recruit for your open position. Linkedin can also put your job opening ad all over targeted Linkedin users pages so that they can be made aware of an opening that fits their skill set. This is a paid feature of Linkedin.
4. Add Updates – Now that your Linkedin page is more complete, you will want to gain followers by engaging users and adding updates. If you navigate to the homepage of your Linkedin company page, you will see an area where you can add updates. These can be links to blogs, questions to your followers, pretty much anything that you would post on your company Facebook page. If you paste a link, like on Facebook, it will quickly crawl that page to grab a title, description and thumbnail.

It would be wise to encourage your co-workers to share updates as that they enjoy. This will help your exposure and possibly gain your company page some more followers.
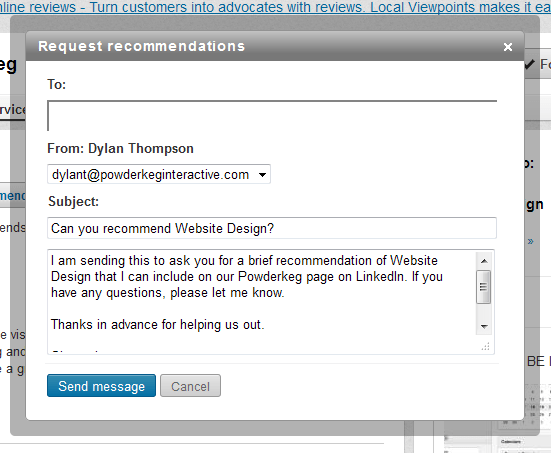
5. Get Recommendations – Much like you can now receive endorsements on your personal Linkedin profile, you can gain recommendations on your Linkedin company page. To do this, go to your services and products page, under each one you will see a link that says Get Recommendation. If you click on this, it will open up a pop up box where you can then add Linkedin contacts to send a letter to requesting a recommendation.

Hopefully this walk-through guide to editing / customizing and improving your Linkedin company page has helped you. Feel free to share this post on your amazing new Linkedin page!


