
As your website goes through its natural progression and evolution, there are plenty of updates that you can do within WordPress. One common update that many people don’t realize their able to do is to update the navigation or add/remove pages from user visibility. Updating the navigation is also a great way to improve engagement!
For most WordPress based websites, the administrative role should be able to add, remove, or modify elements of the navigation menu. If you are new to WordPress or simply need a refresher, below are the steps on how to complete the most common navigation updates.
Getting to Your Menu
Step 1: If you have been following WordPress 101 then you know the drill. Log into the WordPress admin to get this party started.
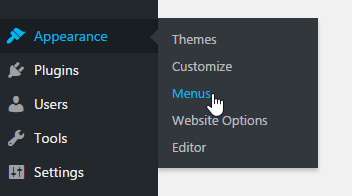
Step 2: In the Admin menu on the left, select Appearance, and then Menu.
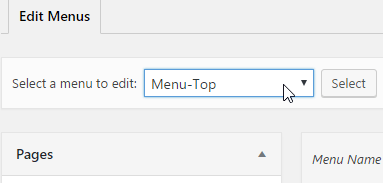
Step 3: If your site has more than one menu, be sure to select the correct menu from the dropdown at the top of the screen.
Removing a Page:
You may want to remove a page from the navigation. You may want to either delete a page, or you simply don’t want a current page in the menu anymore. The page will remain live (links will still work, etc.), however visitors will not be able to navigate to it through the menu.
In the menu listed, find the item/page that you’d like to remove from the menu and select the down-arrow to expand your options. Click the ‘Delete’ option.
Note: This will NOT delete the page from the site. This will only remove the page option from the menu.
Adding a Page:
In addition to deleting pages from the navigation, you can easily add pages as well. Adding a page to the navigation happens most often when a brand new page is created, or an existing page needs to be highlighted.
On the far left of the Menu screen, you should see a listed menu of all of the pages on your website. Click the check-box next to the page(s) that you would like to add to the menu. Click the ‘Add’ button.
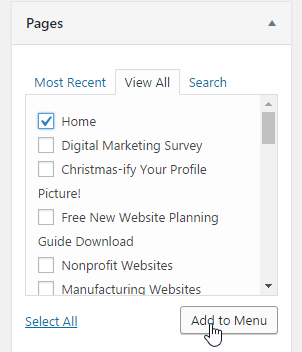
This will add the new page to the bottom of the Menu Structure list, and from there you will be able to arrange it however you’d like. It’s a good thing the directions for that are just below!
Rearranging Menu Order:
Any time you need to place a newly added page into the correct spot, or change up the navigation layout, rearranging the menu is a great trick to have up your sleeve.
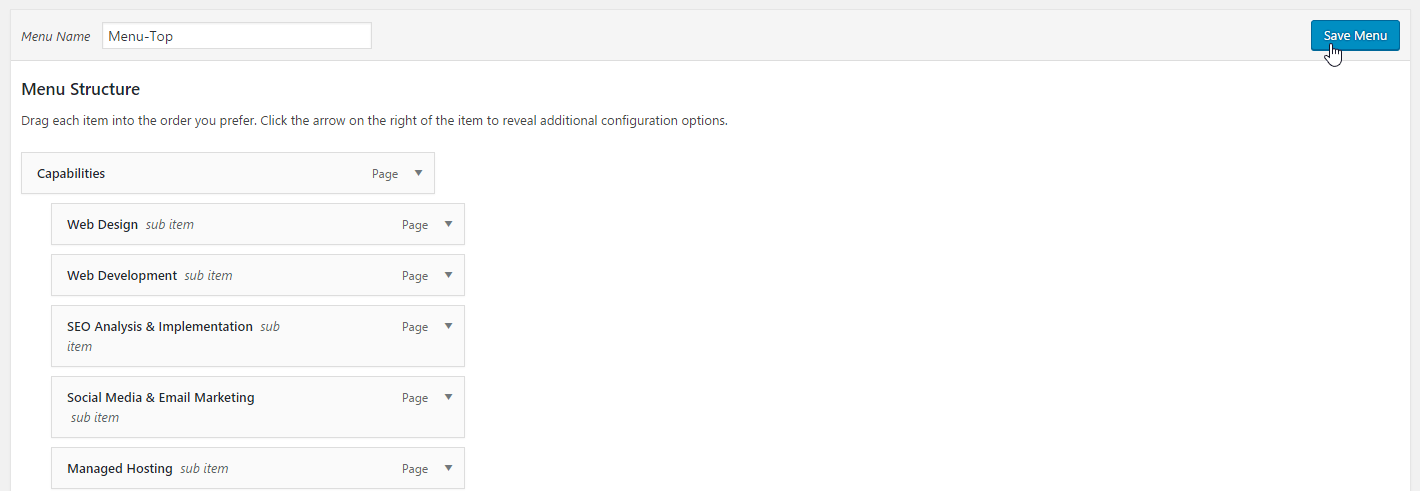
When you look at the Menu Structure, pages are laid out in their order on the site, with sub-pages showing up underneath parent pages.
The easiest way to move menu buttons is to click and drag the page into place.
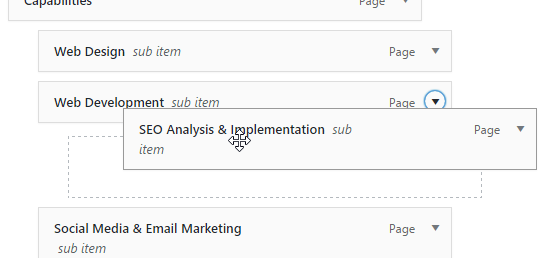
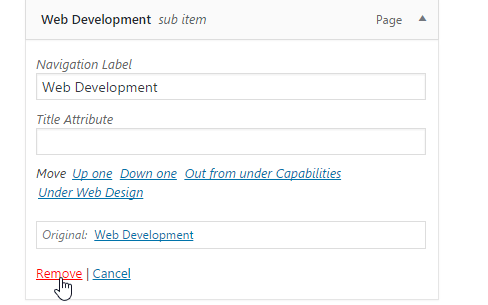
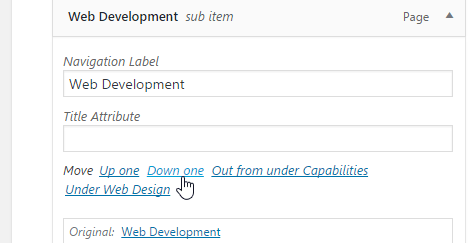
Another way to manage the navigation is by using the ‘Move’ options in the page dropdown. This is best to move it to a different level within the navigation. Generally, there are usually two levels made up of main (parent) or sub (child) pages.
“Up” or “Down” will move the page within its navigation level. “Out from under” or “Under” will move the page to a different navigation level, either a parent page or sub child page.
Review
Once you have completed all of our desired updates to the navitgaion, it’s always good to do once last review to the Menu Structure. If all looks good, then be sure to save!
And that’s it! Now, with this new knowledge go forth and update that outdated navigation page!
Do you have more questions about WordPress or making updates to your website? Contact us and we’ll be happy to help! Don’t forgot to also check out our other Blog posts for more tips, trick, or general information to help you navigate this wide world of the web.