A few months ago we posted some information about image uploading in WordPress.
Today I thought it would be good to give some more detailed information about the best ways to optimize images you upload to your website.
Why Optimize Images?
Image optimization not only reduces the size of your web pages, allowing faster page loads, but Google also loves it. When you have optimized images your page speed rankings in Google and other search engines is increased, giving you a better chance of being on top of their search results.
Choosing the Image Type
The first, and most important, thing to know about uploading the correct image is to know the difference between JPG and PNG images.
99% of the images you will upload will be one of these two types. If you are uploading BMP, GIF, or other image format you will likely want to convert those to PNG or JPG depending on what type of image they are.
When to use PNG
PNG images are best used for most logos or small icons. Generally logos and icons use a “Flat Design” which reduces the complexity of an image into its most simple shapes, and colors.
For Example, Google’s logo uses a flat design and is saved as PNG.

This works well for PNG because it uses something called “lossless” compression. This means that every pixel is saved so the image is replicated exactly. The PNG file format is able to compress an image’s file size by using fancy techniques to save a pixel perfect image without actually saving every pixel’s information. This allows PNGs to have pixel perfect representation for clean lines and bright colors.
One important note is that when transparency is required, PNG is also required. Unfortunately JPGs do not allow for any transparency. If you need an image to have a transparent background then it must be saved as a PNG. For many images this is not a big deal, but sometimes it will make sense to instead save an image with a white (or other color) background so that you can save it as a JPG.
Short Answer: When an image has few colors or needs transparency.
When to use JPG
JPG is the best filetype to use for photos or other complex images with lots of colors and details. JPG uses something called “lossy” compression. This means that it does not actually save every pixel in an image. Instead it saves information about regions of pixels which allows JPG to greatly reduce its file size. This technique works great for complex images since the human eye has a difficult time noticing that every pixel isn’t quite perfect. While great for complex images, JPG is not so good for flat images – like logos. When used for these types of images JPG will create “artifacts” in the image, which make the image look fuzzy or otherwise lacking clarity.

Above is the same Google logo from before saved as a JPG. I have reduced the JPG quality to exaggerate the artifact effect, but even at the highest quality the artifacts will still appear. If you look close you should be able to see how the image is slightly distorted by the JPG “lossy” compression. What you might not be able to tell right away is that the image also no longer has any transparency and instead has a white background.
One of the great things about JPGs is that they have the ability to be saved at various “qualities”. Basically, how much information is lost with the “lossy” compression technique. This can greatly reduce the file size of an image, without reducing the visual quality. Here is an example of a full quality (100%) vs half quality (50%) image. Can you tell the difference?
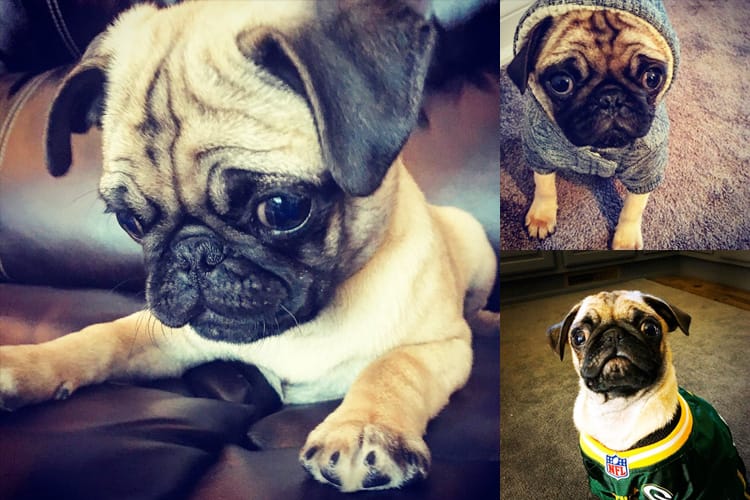
100% quality; 172KB file size
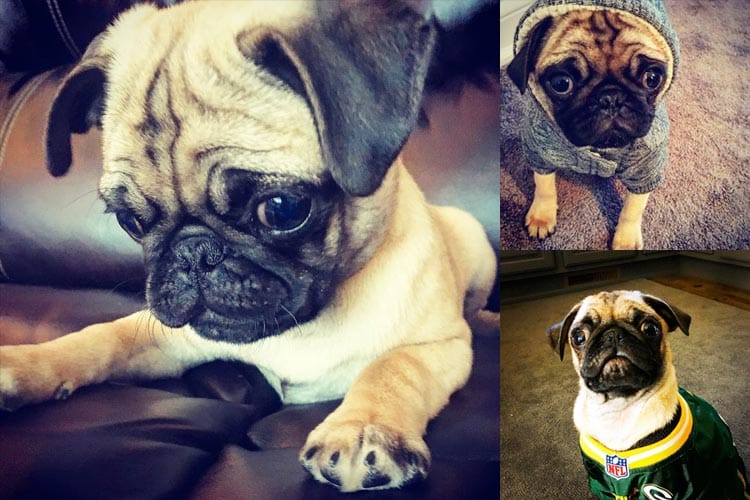
50% Quality; 81KB file size
Feel free to click on those images to see the full size image and compare them. As you can see, simply saving a JPG image with 50% quality can greatly reduce the file size of an image without harming the visual quality.
I also created a PNG version of this image, but decided not to upload it since it would add 657KB to this page’s file size! If you would like to view the PNG version of this image you can click here. While the PNG image looks great, it is also 4x larger than the 100% quality JPG version. This is a great example of why you should always upload photos as a JPG.
Short Answer: When using a photo or other complex image.
Choosing an image size (in pixels)
This is a tricky issue and is sometimes out of the users control, but I see it all the time that a user will upload an image that is way too large, or small, for the position on the page that the image will occupy.
Say you have an image floating on the right side of your text. You should take care to upload an image that is the same size (in pixels) as the largest size that the image will be displayed and no bigger.
You might ask, “Why does this happen?”, so let me try to explain. Web developers will usually force an image to have a maximum size when it is displayed on a page so that it does not cause issues when rendering a page, like an image floating off screen or crowding the surrounding text. However, just because an image is displayed at this size, the browser still has to load the image file that was uploaded. So if a user uploads an image that is 1200×1200 pixels in size, but that image will never be displayed at a size greater than 600×600 you are forcing the user to download an image that is twice as large as it needs to be.
Exception: There is an exception to this rule because of retina screens (screens with very high pixel density). If you are uploading a PNG file and you need it to display crisply on a retina screen you will want to make sure you are uploading an image twice the size of the image size on the screen. JPGs will usually work just fine on retina screens at the normal size.
Short Answer: Upload an image that is the same size (in pixels) as the largest size that the image will be displayed.
Additional File Size Reduction
The final tactic we are going to cover today is using another tool for file size reduction.
When images are saved with Photoshop, or your camera, or almost any other source, they are saved with a variety of hidden information (aka meta information). Information like: Author, Location, Timestamp, etc. None of this information is necessary for use on the web, but it still adds to the file size of the image!
Another important part of file size reduction is making sure the best and most modern compression techniques are applied to your images. Most software programs (including Photoshop) do not always apply the best compression techniques for reducing file size. For that you will usually need to run your images through one more program specifically designed for image compression.
The best way to remove this information and improve the image compression is to run the image through an image optimization program. Here at Powderkeg we use ImageOptim. This is a paid service, but there are also multiple free online services you can use for your images. Check out one of these sites for online file size reduction: TinyPNG, Compressor.io, Optimizilla, or Kraken (paid).
Conclusion
Now that we have gone through the most important techniques for reducing your image size you should now have the knowledge to greatly increase the speed of your website! Images are often the largest part of any web page and add the most bytes to a pages download. Reducing your image file size is often the simplest and most effective means of decreasing the loading time of your website and improving your search rankings.
Good luck and great speed!